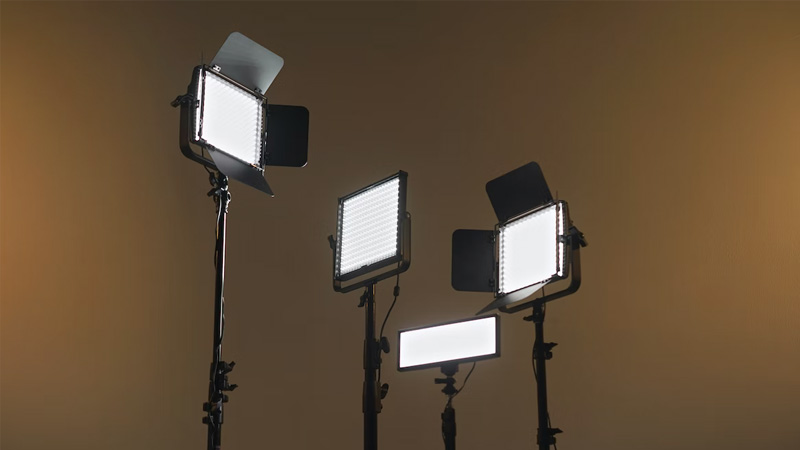
Photo retouching services are a fundamental tool for any e-commerce business. Photo retouching services enhance the selling potential of your product images by removing distracting backgrounds and improving the quality of your photographs.
With our eCommerce retouching turnkey solutions, you’ll unlock the power of listing quality images and increase your bottom line.
You’ll need product retouching services for your e-commerce store. You’ll also want retouched images to properly make your products look their best.
If you’re looking for eCommerce retouching, our team of professional editors can help. We offer a range of photo editing services to help make your online store more appealing and usable.
10 Photography Tips for Rookie E-Commerce Photographers
Photography is one of the most critical components of a successful e-commerce business. It’s the first thing consumers see when they see your product, setting the tone for their experience with your brand. It can be challenging to attract customers if you don’t have high-quality images.
However, photography isn’t just about taking the perfect shot. It’s also about knowing how to edit your photos and sell them. If you want your products to stand out in an oversaturated market, then you must know how to take great product photos.
As you start your e-commerce business or improve your skills, here are some tips to help you take photos from amateurish to professional.
1. Get close.
Zoom in on your subject so that it fills up most of the frame and ensure there’s no distracting background clutter. It will make your product stand out from the competition and make it easier for customers to see what they’re buying.
Don’t use a wide-angle lens because this distorts the image and can make products look distorted or stretched out.
2. Make sure your subject is well-lit.
It would help if you avoided harsh lighting, which creates dark spots on the skin and a lousy contrast ratio that can make subjects appear unevenly lit. It will make your product look more professional, and it will also sell better.
The best way to avoid harsh lighting is by using natural light. If you don’t have sunlight access, set up your photo shoot during the day and use lamps or other artificial light sources.
3. Don’t use a flash unless necessary.
Flash can cause red eye and make your subject look washed out and sickly (unless they are vampires). If you must use a flash, make sure it is off-camera and pointed away from your subject.
It will help prevent red eye and make for a better product photo.
4. Create a dramatic effect by shooting your subject in black and white.
It’s easy to forget color when taking pictures of products because it’s usually not as important as the product itself! However, it’s also important to remember that paint can help create a mood and feeling in your photos.
If you are shooting for a client who sells luxury items, black and white may be the way to go.
5. Shoot from a high angle to create a sense of importance.
Shooting from above can give your product photos an impressive and professional look. Try standing on a step stool or ladder for extra height, or if you’re indoors, see if there is another room or area where you can get higher than the item in question.
You can also try shooting from the side or at an angle that makes it look like the product is towering over you.
6. Use props that add context and meaning to your photo.
Props can help tell a story about your product while making it more visually attractive. Try using props related to the product or industry, and make sure you shoot them in a way that makes them look good.
If you’re selling sunglasses, for example, use some in your photos; if you’re selling jewelry, try wearing some yourself. These accessories can help tell a story about your item’s history and how it fits into people’s lives.
7. Take advantage of natural light.
We covered this earlier but using natural light can help make your product look more appealing and authentic in photos since it will give a more realistic representation of the colors and textures you’re trying to show off.
Natural light can also help you take better pictures since it doesn’t require additional equipment or time to set up. If you’re shooting outside in the daytime, try taking photos at different times to see what works best for your products-morning light may be softer and more flattering than afternoon light.
8. Use a tripod.
Using a tripod will help ensure that your product photos are as sharp as possible since any movement while taking the picture will result in blurry images.
You can also use a remote trigger if you don’t have one-this allows you to take pictures without touching your camera, so you’ll be less likely to introduce shake into the image while pressing the button.
9. Use a consistent background.
A white or neutral-colored background is the best choice for product photos since it allows your products to stand out and appear larger than they are.
Try using a piece of paper, fabric, or cardboard as a backdrop-you can even tape it directly onto your wall if you want to avoid wrinkles or creases. If you’re taking the photo outside, try to shoot on a clear day with minimal wind and cloud cover.
10. Make sure the product is in focus.
Even if you follow the other tips above, if your product isn’t focused, it will appear blurry and unappealing. To avoid this, use a camera that allows you to control the focus manually.
If your camera has a “macro” or “close-up” setting, try using it-this will allow you to get closer to the product and focus on just one small area instead of capturing everything at once.
Conclusion
Photography is one of the most critical aspects of your e-commerce business because it’s what allows you to showcase your products in the best way possible.
It’s important to remember that there are many ways to take a good photo, and it’s always worth experimenting with different styles and techniques.
We designed the tips in this guide to help you get started in the world of e-commerce photography, but there are many more resources available online if you want to learn more about specific topics.
Keep researching, keep practicing, and have fun!


